Sunday, September 24, 2006
Jacketless Lapels
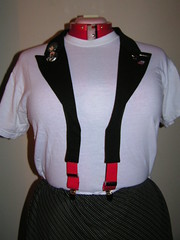
After figuring out how long to leave the front bits, I took a pair of red (thrift store) suspenders, cut them down and inserted into the open ends of the cut-down and folded inward plackets, and stitched them in. Add Alex and Hannibal buttons and voila! (The pins on the left lapel are from the Dirty Show art show that the lapels went to last night.) It's one of those items that people look at without really seeing until suddenly they realize... there's no jacket!
New Kitty Tree in the Hizzy!
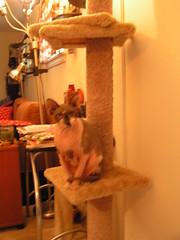
This cheap thing was on sale at Meijer, so I grabbed it. Got it home, found out how cheap it really was and how it didn't quite fit in the space the way I thought it would. By the time I'd turned around to grab the box to repack the thing for return, Sevie was attacking it like a crazy person. So it stays.
He's such a monkey. Look at how his tail is wrapped around his front foot.
Fred is Full
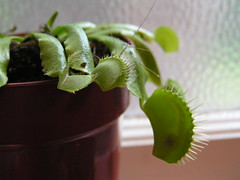
Fred is going to have to go dormant soon, for the winter. Spoils all my fun.
Friday, September 15, 2006
Nosferatu Zippered Pouch
I was turned down to be a vendor.
Thursday, September 14, 2006
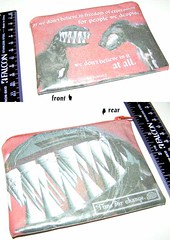
Quote Wallet
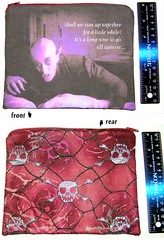
I designed some zippered wallets/change purses intended for sale at the Detroit Urban Craft Fair, August 2006. Each wallet featured an original design (mostly using modified stock art/illustration) and a strong quote, mostly of the "free thinking" variety. Each piece also features a small logo on the back which says "Time for change," next to a little maze/brain.
Once again, I printed plain white muslin on my Epson printer; one piece for the front and back, folded at the bottom. I sealed the outsides with heat-fusible vinyl and assembled the wallet with a vinyl lining (change is dirty!) and a colored coil zipper.
I was turned down for the fair. But this particular wallet found its way to my friend Dave.
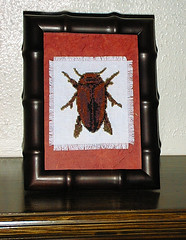
Beetle X-Stitch
Photoshop is a good tool for this. I think there are plug-ins available, but I just did it by hand. I decided I didn't want to use more than 6 colors, so I reduced the image's colors and resolution until I had a pixellated version of the art. Then I just followed the chart on cross-stitch canvas, mounted it on a small piece of handmade Japanese paper, and mounted the whole thing in a faux bamboo frame. I was very happy with how it turned out and wish I had taken better photos. As always, Teller's thank you note was very appreciative.
Zipperhead Bag
 This is the bag I started with, about a year ago. I had gotten an Epson inkjet printer, specifically for this sort of project, and this was my first attempt at printing fabric using the DuraBrite ink system.
I started with a piece of artwork I'd nabbed from Worth 1000 some time ago; a hand-colored Bride of Frankenstein still. After deciding what size the bag would be (basically big enough for my phone, wallet and keys), I printed the panel and assembled a very simple lined bag with a zipper at the top.
I was very happy with the way it turned out and started printing pieces to use in a variety of projects, including the one I want to talk more about following. (By the way, after more than a year, the Elsa bag is still brightly-colored.)
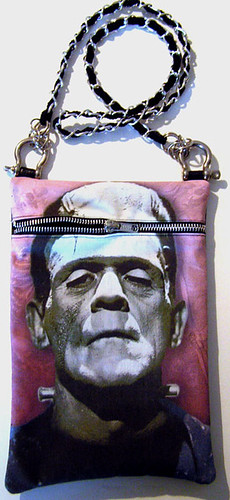 With the Elsa bag in mind, I decided to do a sort of companion. But this time, I wanted to use the zipper as a design element in addition to a closure.
I started with the classic Frankenstein portrait and created a piece of artwork (on my Mac) featuring hand-coloring and some more details in the background. They show up much better in person, where you can see there are cherubs, a skeleton, etc., behind him. Some of the colors are quite subtle and were difficult to photograph.
After deciding on a size (again, basically big enough for phone/wallet/keys), I drafted the pattern entirely in Photoshop, splitting open his head and adding allowances for the zipper insertion. Then print, cut, stitch, line, flip, tada! It's got a pleather back panel and embroidered linen in the interior (black with multi-colored lizards--a very cute leftover scrap). The hardware attachments are rope cleats of some sort scored from Lowe's, and the chain handle is scavenged from a belt. It's all adjustable; in fact, I made two different chain straps, one for across-body and one for over-shoulder (shown--there is a narrow webbing woven through the chain, and a small chainmail piece at each end). I also finished it off by a little bundle of lock and key dangles on the zipper pull, after I had already taken the photo.
Now, here's the really funny part of this. I had made it specifically to carry to a tattoo convention in Toronto this summer. At the same time, though, a website I sometimes visit, Pattern Review, was having a handbag contest. And it was a "season" theme! I decided that Halloween was a season, and I entered this bag almost as a lark. As I'm sure you can guess, people who spend a lot of time on sewing websites tend to be more Holly Hobbie than Halloween, and when I post my goofy things, the best I can typically hope for is to be ignored.
The contest was decided by visitor/member votes, and boy was I surprised when I found I had tied for the win! The other winning bag was exactly the sort of thing I had expected to take the contest--a beautifully-constructed floral clutch. I was so glad to see the other visitors evidently had more of a sense of humor than I'd privately given them credit for. (I won a gift certificate for a sewing pattern site, incidentally, which is a little ironic since I didn't use a pattern for the bag.)
Tuesday, September 05, 2006
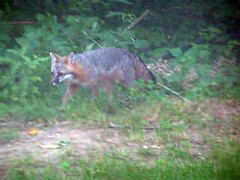
Grey Fox
Very cute, and not really in a hurry. He trotted around from the back of my house (where the woods and creek are) to the side, where I think he found some hamburger buns or something from my birthday party. And he's all welcome to 'em!
Monday, September 04, 2006
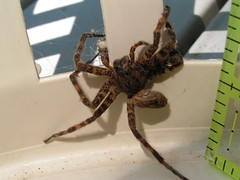
Spider
Anyone know? My best guess so far as that it's some sort of fishing spider. As in, they CATCH FISH.
Rodeos are Kinky
Buckin Horse
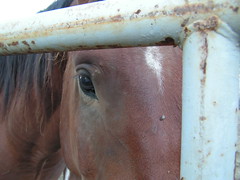
It's hard to imagine that a couple of hours earlier, this horse was insanely trying to remove some yahoo from his back. When I was standing by the railings, several of the buckin horses strolled casually over to say hello and get a nice scratchin between the eyes.
My New Boyfriend
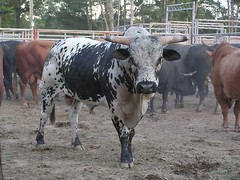
Afterward, I was checking out the buckin bulls and horses chillin in their pen out back. Being a rodeo neophyte, I was a little surprised that they all hang out together, calm and friendly as you please.
And then this guy caught my eye. And wouldn't let it go.
Imagine this massive head pointed in your direction. Then imagine it locking your gaze and refusing to look away. You lean left, he follows. You step right, he scans right along with you.
After several minutes, I had to remove myself from the area for fear that my vision of all 1,500 pounds of him rushing the barricade would come true.
Friday, September 01, 2006
Rodeo Detail
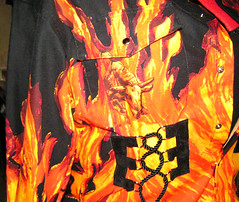
As always, the reds and oranges are disrespected by the web.
Rodeo Outfit
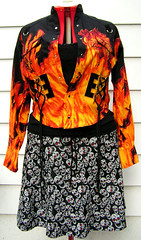
Rodeo Outfit
Originally uploaded by shefightslikeagirl.
This is an outfit -- er, "outfit" -- I made to go to a rodeo this weekend.
First of all, hooray Halloween fabric season! I love the time of year when I can say, "Gee, what I'd really like to make is a skirt with glittery-eyed skulls all over it!" And then actually DO that. As opposed to the other 9 months out of the year, when I say that, and ... can still do it, for probably half-price. So, uh, hooray Halloween fabric clearance season!
The skirt uses a basic pattern of front panel, rear panel, and front/rear yoke. The yoke is a pin-tucked slightly stretchy remnant of some sort. No elastic or closures; just uses a drawstring.
The shirt is one I bought resale. It's a REAL cowboy shirt! I love it and it's gorgeous, but unfortunately (?) I'm not exactly built like a real cowboy. So I had to come up with some ways to "feminize" this thing a little bit. What I did actually seems to have worked.
Step 1: Remove stiff pointy collar.
Step 2: Attach D-ring tabs to shoulder-area-pointies.
Step 3: Attach D-ring tapes beneath pockets (i.e. under breastage area).
Step 4: Remove, seriously, like 7 inches from hem. This probably made the biggest difference.
I considered whether to do something to/with the long sleeves, but then got tired of thinking about it and had a drink.

